PowerPoint is not specifically designed for removing image backgrounds, but it does offer some basic tools to do so. Here’s how you can remove an image background using PowerPoint: (Below is the example and its result)

1. Insert the image you want to remove the background from into your PowerPoint presentation. Got to ‘Insert‘ tab->’Pictures‘->’This Device‘ and then select/insert the required image.

2. Click on the image to select it.
3. Select the “Picture Format” tab from the PowerPoint ribbon at the top of the screen.
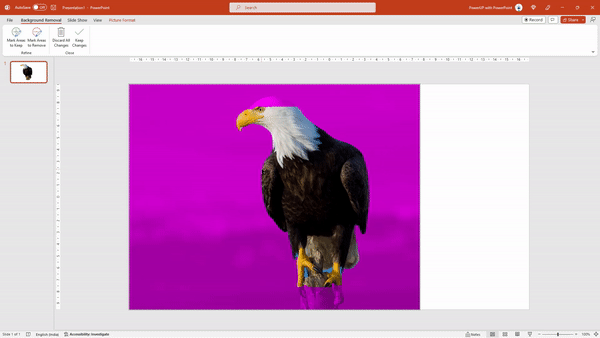
4. Click on the “Remove Background” button and that enables PowerPoint to automatically detect the portion of image to be removed (Pink color portion).

5. Next choose ‘Mark Areas to keep‘ option and the drag over the required image portion to exclude it from removal process.
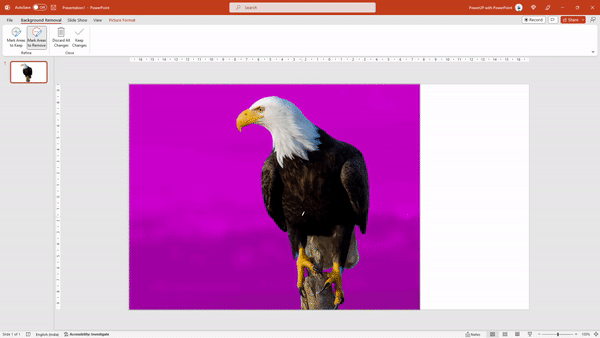
6. Next choose ‘Mark Areas to Remove‘ option and the drag over the required image portion to removed.

7. Once all the selection is finalized, select ‘Keep Changes‘ option to make your image transparent as needed.
For detailed tutorial, please checkout my below Youtube video.


