Microsoft PowerPoint is a powerful tool for creating presentations, but sometimes the default font options just don’t cut it. Luckily, it’s easy to install new fonts in PowerPoint so you can add a unique touch to your slides. In this article, we’ll walk you through the steps of installing fonts in PowerPoint so you can start using them in your presentations.
The first step to installing a new font in PowerPoint is to download it. There are many websites that offer free and paid fonts for download. Some popular sites include:
• Google Fonts (https://fonts.google.com/)
• Dafont (https://www.dafont.com/)
• Font Squirrel (https://www.fontsquirrel.com/)
• MyFonts (https://www.myfonts.com/)
Example shown : Google fonts.

Once you’ve found a font you like, download the file to your computer. The file should have a .ttf or .otf extension.

Once you’ve downloaded the font file, you’ll need to install it on your computer. To do this, follow these steps:
• Double-click the font file to open it.
• Click the “Install” button to install the font on your computer.

Once the font is installed on your computer, you can start using it in PowerPoint. To do this, follow these steps:
• Open PowerPoint and create a new presentation.
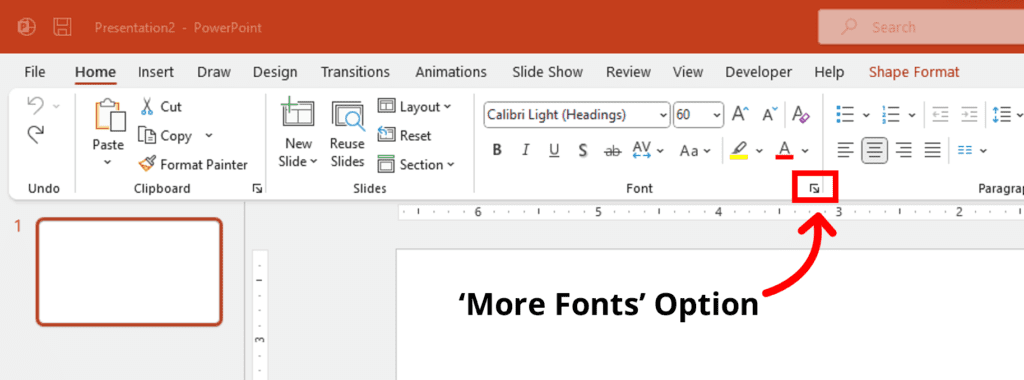
• Click on the “Home” tab in the ribbon.
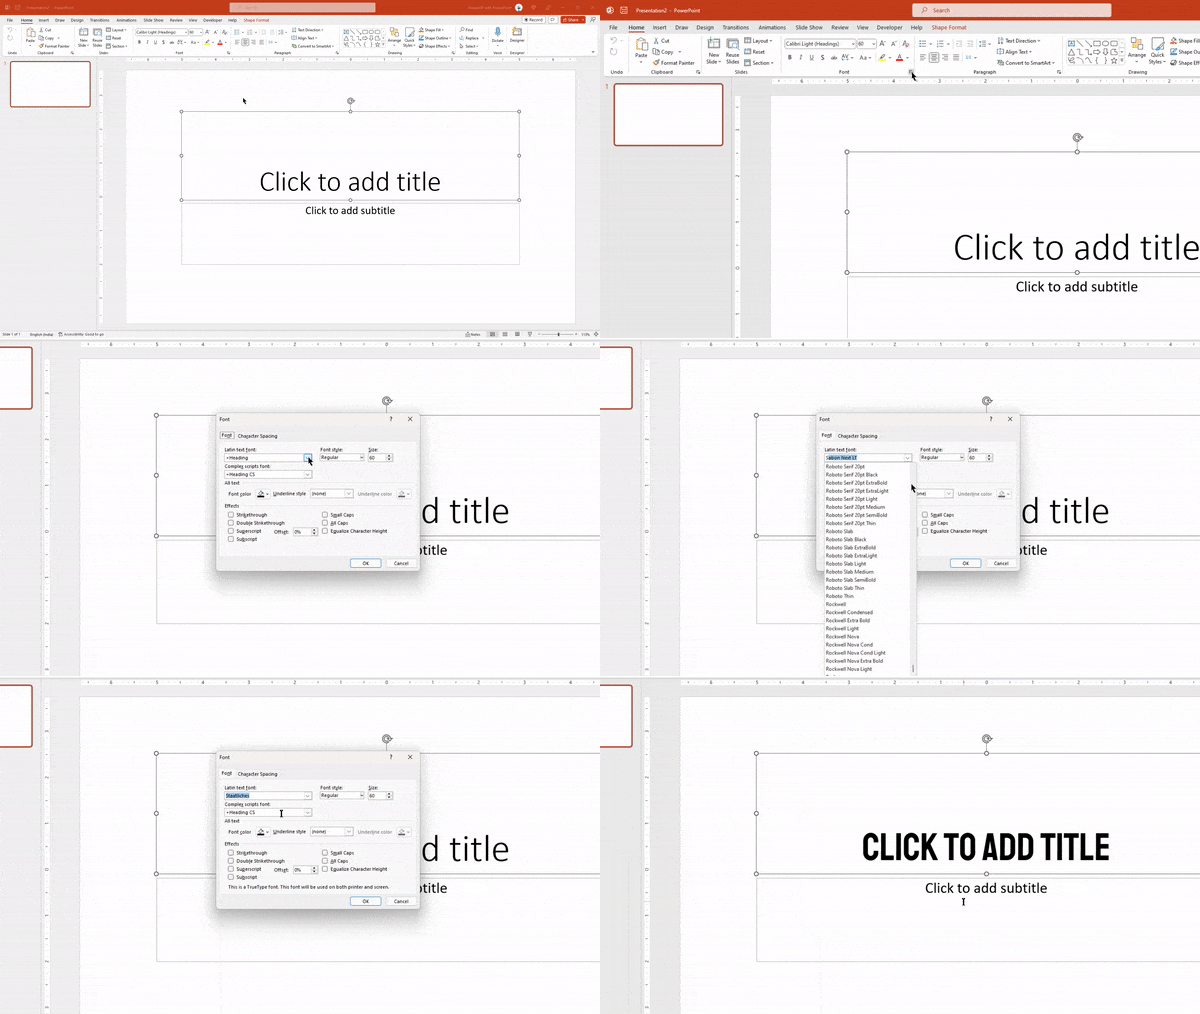
• In the “Font” group, click the “More Fonts” button.
• In the “Fonts” window, scroll through the list of available fonts until you find the one you just installed.
• Click the font to select it and then click “OK” to close the “Fonts” window.


And that’s it! You’ve successfully installed a new font in PowerPoint and can now use it in your presentations.


